This page describes the how to use Create-A-Maze on the projekt page of Maze 5 to create a maze online.
The Parameters
You can influence the creation in many ways by specifying the miscellaneous parameters. The effect of a parameter change can be observed at the sample image on the page. There are some limitations e.g. larger values of rows and columns will not be visualized.
Create-A-Maze Parameters,
Note: Not all combination of parameters are practical. If you enter an invalid value or trying to create a too large maze you will get an error message.
Maze Type
First choose a Maze Type. There are 30 different (sub)types of mazes. You can see the pattern as small image beside the checkbutton.
Creation Parameters
- Rows/Rings
Specify the number of rows here or for a theta maze the number of rings - Columns/Segments
Specify the number of columns here or for a theta maze the number of segments of the inner ring. Make sure you choose a value between 3-8 for segments if you create a theta maze - Crossings
Some maze types could have crossings. You could specify the numbers of them. - Tileable
If you select it, a tileable maze will be created. Bordersize will be set to 0 if you select this. It has no entrance and no exit. Possibly the number rows and/or columns will be rounded up to a suitable number for creating a tileable maze. This option can lead to unexpected result if combined with option like ”Solution” or ”Mask Image”. It is useful for creating background images. - Seed
The value is used to feed the random number generator. If you enter a certain value greater than 0 you get always the same maze as long as don’t change it (and any other parameter of course). - Algorithm
Specify the algorithm for carving the maze:- The recursive backtracker creates a maze with long and winding dead-ends
- Prim’s algorithm generates many short dead-ends
- The Growing Tree algorithm can be parameterized with a parameter between 0 and 1. With 0 it will behave just like the backtracker. With higher values more short dead ends will be generated similar to Prim’s algorithm
- Mask Image
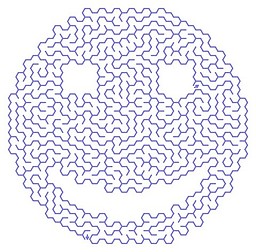
You can upload an image for specifying where cells should be created and where not. For best results use a black-and-white image. Cells will only be created where the image is white. So there should only be one (connected) white area in the image or you will get a maze with not connected cell areas. By the way you should take the Nyquist–Shannon sampling theorem into account and use sufficient rows and colums or image structures large enough to be depicted by the given number of rows/columns. The mask image will be always scaled to a suitable size.
Below you can see how a mask image works:
Drawing Parameters
- Foreground
Select the foreground color here. - Background
Select the background color here. - Solution
If selected a solution path will be drawn into the maze. Is is not useful to combine it with the ”Tileable” parameter. - Fuzzy Lines
If selected the maze will be drawn with fuzzy lines. - Organic
If selected the maze will be drawn in an organic way. - Border Size
Specify the border size in 1/72 inch here. This parameter has no effect if creating a tileable maze. - File Format
Specify the file type to generate:- PNG is an image file type and should be displayed directly by most browsers. You can of course save it to disk with your browser.
- SVG is a standarized vector format and can be edit with suitable tools like inkscape
- PDF is a read-only document format and can be viewed by any PDF-viewer
- Cell Size
Specify the size of a maze cell here. Roughly a value of 72 gives a cell size of one inch (25.4 mm) in SVG or PDF format; in PNG format it would mean 72 pixels. - Line Width
Specify the line width in 1/72 inch here. - Arc Factor
If the maze type contains arcs, this parameter affects the angle of the arcs. With the default value of 1 the arcs will be drawn with their nominal angles. Values below 1 are resulting in a smaller angle and 0 will give straight lines. Values between 0 and -1 change the orientation of the arcs. Values between 2 – 180 and -2 – -180 are treated as absolute angles. - Boundary
Specify the orientation for the arcs at the boundary:- Outside – the arcs will be drawn with outside orientation
- Keep – the arcs keep their orientation
- Inside – the arcs will be drawn with inside orientation
- No Markers
If selected no entrance/exit markers will be drawn.

